Every month here at Kozi Design our mission is to deliver helpful information to help you plan and design your home. This August we would like to focus on the heart of the home, the Kitchen. Kitchens are the most expensive room in a home, so we want to help you tackle the most complicated room first.
Two Questions That I Personally All Ask Homeowners First:
What is Your Budget?
This is not a trick question. No number is right or wrong here, but you need to be completely honest with yourself and your team. As a designer we do not judge a client on the number provided, we are simply asking so we can help guide you in the process. This allows us to plan appointments with the right vendors to make selections that fit into your budget. We want to work with you and our goal is not to “blow” the budget.
Suggestion: If it is possible to add to your budget, I highly suggest renting a home or apartment for when the demo and construction starts. Living in a construction zone is not for the faint of heart. Being without a kitchen is also not fun…microwave meals are only fun for a few days.
What is Your Timeframe?
A kitchen in 2022 is a far longer timeframe than one would expect. Plan for delays ahead of time and DO NOT demo until you have things ordered. I say this because the demo portion is so quick (think 1-3 days) but the rebuilding takes so much longer (think min of 4 months). Have a realistic time frame in mind and add 30 days to it.
Before Planning
We need to select a team before planning starts so we can ensure that we move quickly and work together. Having a team assembled to tackle this project is imperative. This needs to happen to make sure that you are able to do the project in a timely fashion.
-
-
- Hire a licensed contractor
- Hire an Architect (If making any structural changes)
- Hire a Designer (We are worth the money, I promise!!) Designers have the contacts and the experience to help you achieve your kitchen goals. Think of us as great communicators to get your vision across to the build side of the team.
-
Step 1: Floor Plan / Design
This is the most important part of the whole process. It is far easier to redraw plans than it is to make changes in the field or on-site. Drawings take a few weeks, but take the time and nail down a plan with your design team that works with your family. A functional kitchen is the objective here.
Think about what you love in your current kitchen and what you really do not like. How do you use the space? Plan out what goes in each drawer and cabinet? Think about your cooking needs: are you a chef or do you have prepped meals you heat up in the microwave? Share with your team what you are dreaming of. Please show us pictures or take us to your friend’s house that you love. We want to get to know you so we can plan your perfect kitchen.
Step 2A: Appliances
Appliances are very delayed and are probably the first thing you need to order in the Kitchen Remodel. Some appliances can be as far as 18-24 months out. Decide on what appliances fit your budget. Think about how you will use your kitchen. Do you want additional refrigerator drawers in the island for cold snacks and drinks? Do you want a wine column for your collection, what about an ice maker? Once you make your selection, order them and DO NOT change said order at all for any reason.
Step 2B: Cabinetry
Find a cabinetry company that can take on your project. This is hard right now in Arizona as we are building like crazy, so we are delayed in this area. If you have a design team, have them send over concept images, CAD drawings, and renderings of your space to help speed up the process. Each cabinet company will do drawings for you to sign off on for acceptance of a design package. Your contractor will no doubt have a connection that can help.
When hiring a cabinet company, not all of them are created equal. Cabinets are one of the most expensive items you will purchase for your home, so please make sure you ask for a referral or to see some of their work. Each budget will help determine what type of cabinet company you are looking for. Cabinetry companies range from completely custom to ready-made to order cabinets with set sizes. The more custom the more expensive. Cabinets are the one area I will tell you not to cheap out on. They are worth the investment!! This is not where I recommend people try and save a bunch of money as quality is important for longevity here.
Step 3: Plumbing

Here is a great example of a Kitchen CAD drawing/elevation. This can really help clients understand what the kitchen will look like.
The next thing is plumbing. These can be 6 months out with specialty finishes. How many sinks, faucets, and pot fillers do we need? We need to order all of these items as soon as possible so we have them ready to install at the right time. I work with several wonderful vendors that I trust to help me put together a complete book for any project. This ensures that the correct items are ordered for each client. My vendors also provide us with photo and spec books to help the trades install all products.
Step 4: Electrical & Lighting
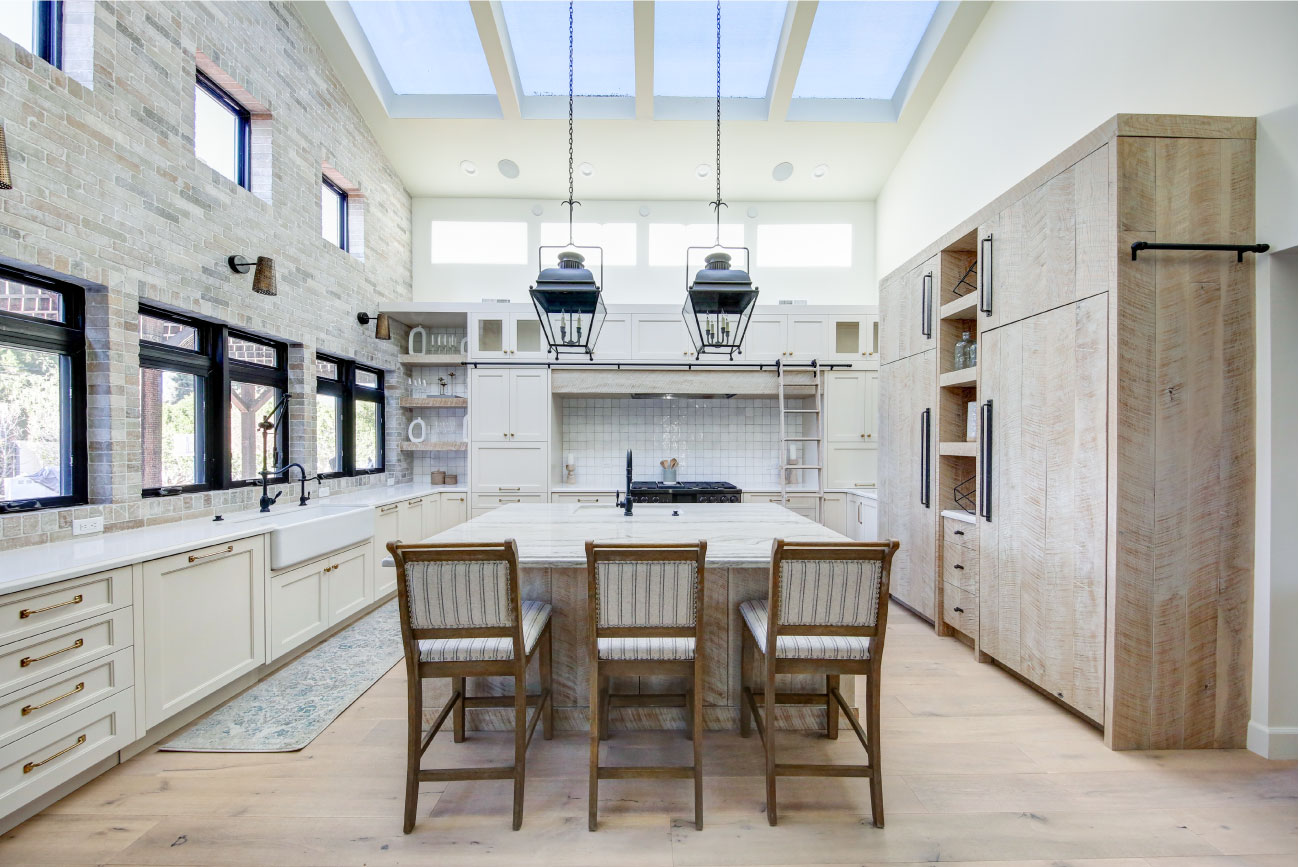
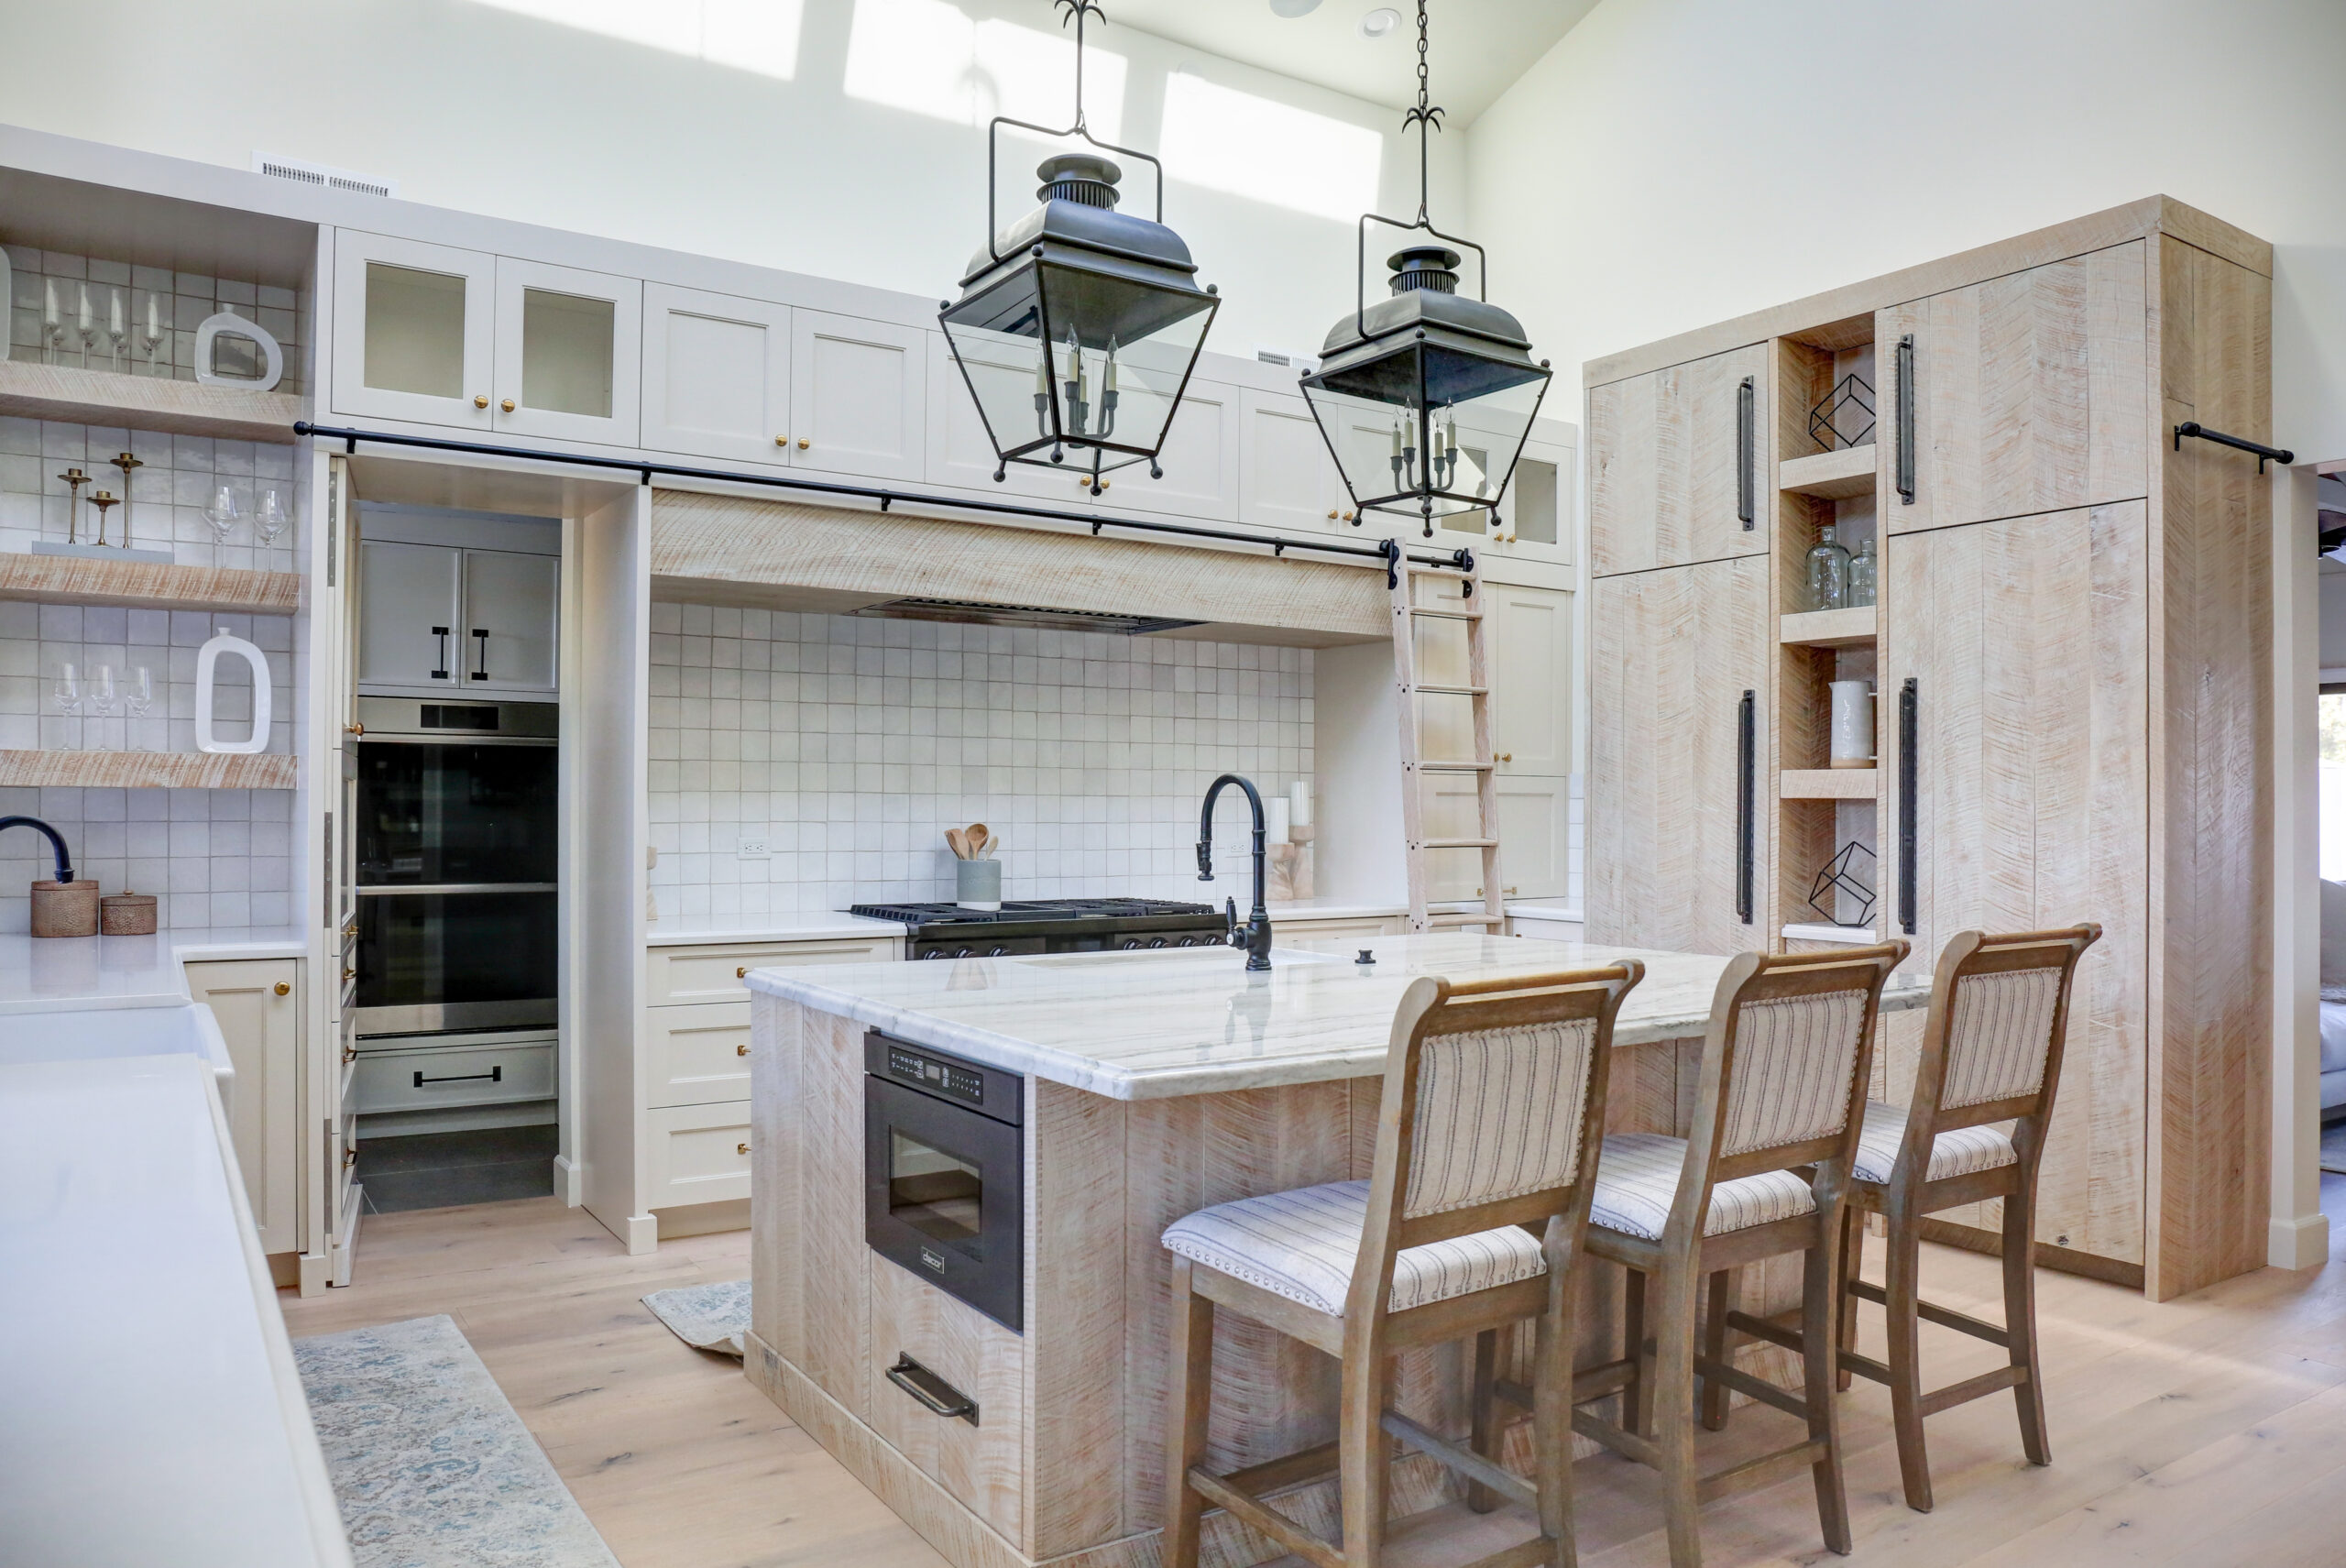
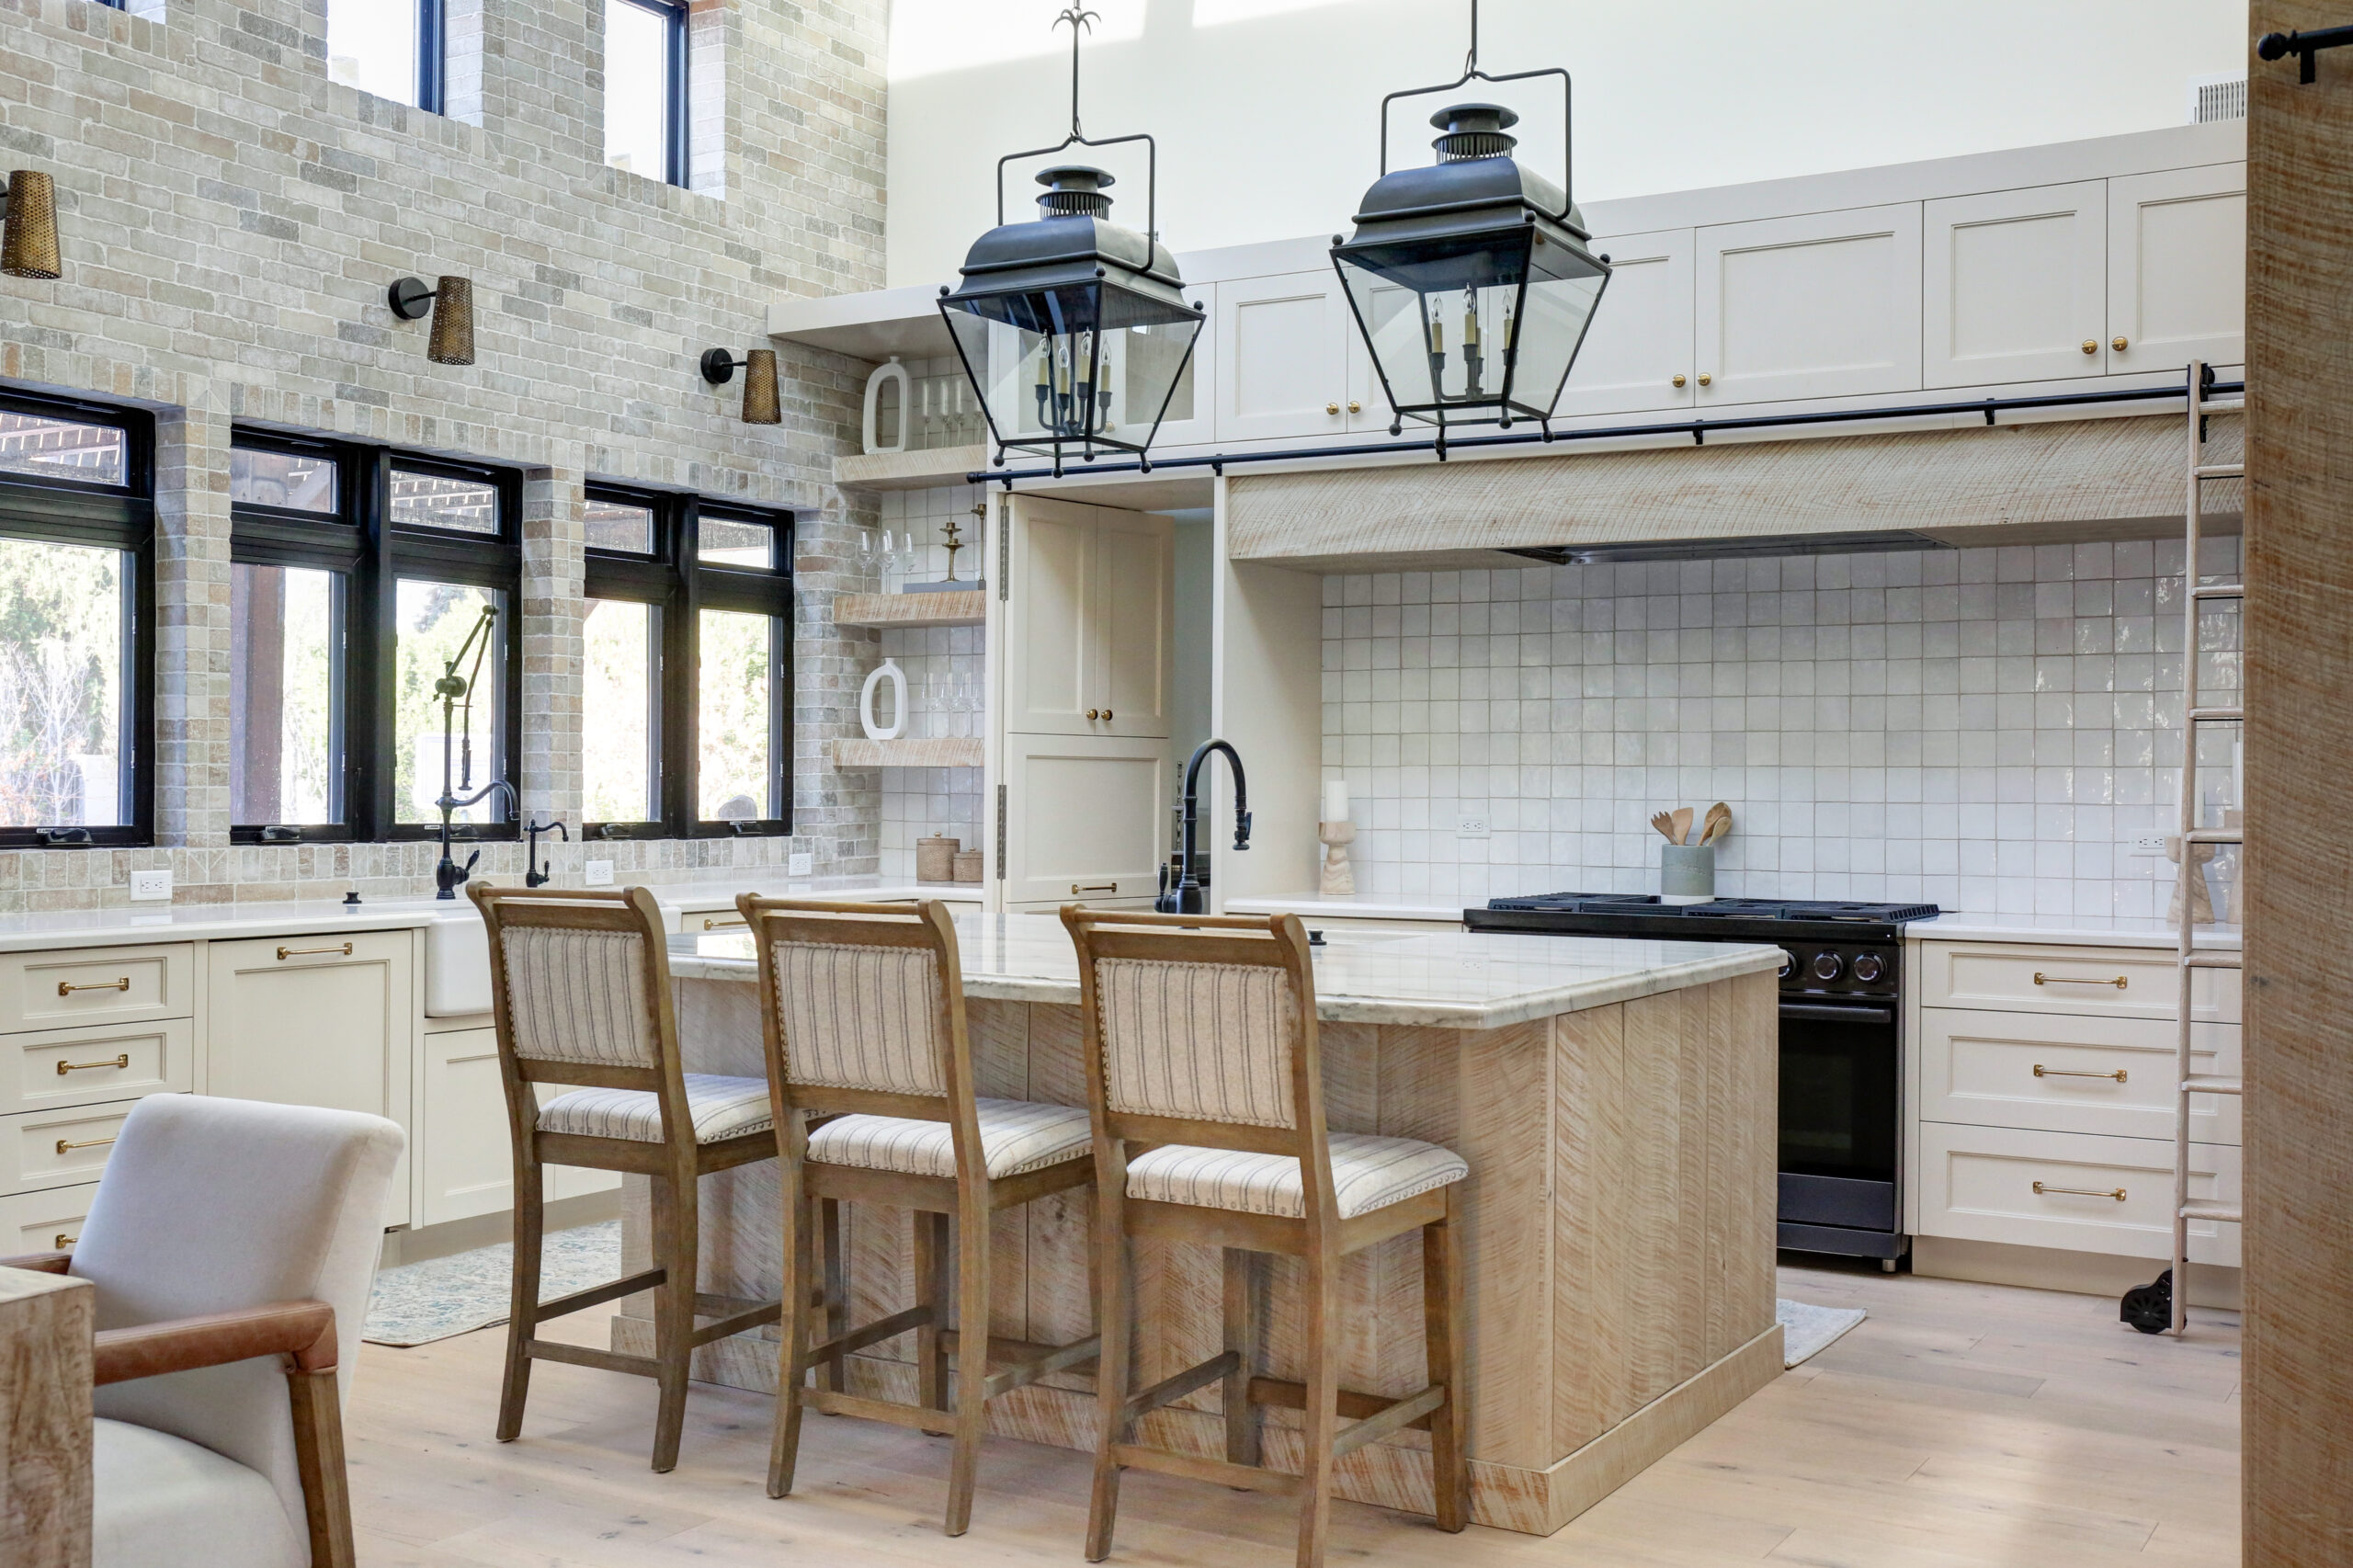
As a designer, lighting can truly transform any space. Take the time to plan for some special details with your electrician. Can lights as well as decorative fixtures and under cabinet lighting can make an ordinary kitchen feel custom.
Check out how many different lighting selections were made for this kitchen. We have oversized pendants at the kitchen island and we have sconces above the kitchen windows. We also have lighting on the floating shelves and in the upper glass cabinets.

Notice That I Have Not Said DEMO Yet?!?
Step 5: Tile Backsplash / Flooring Selections/ Countertops
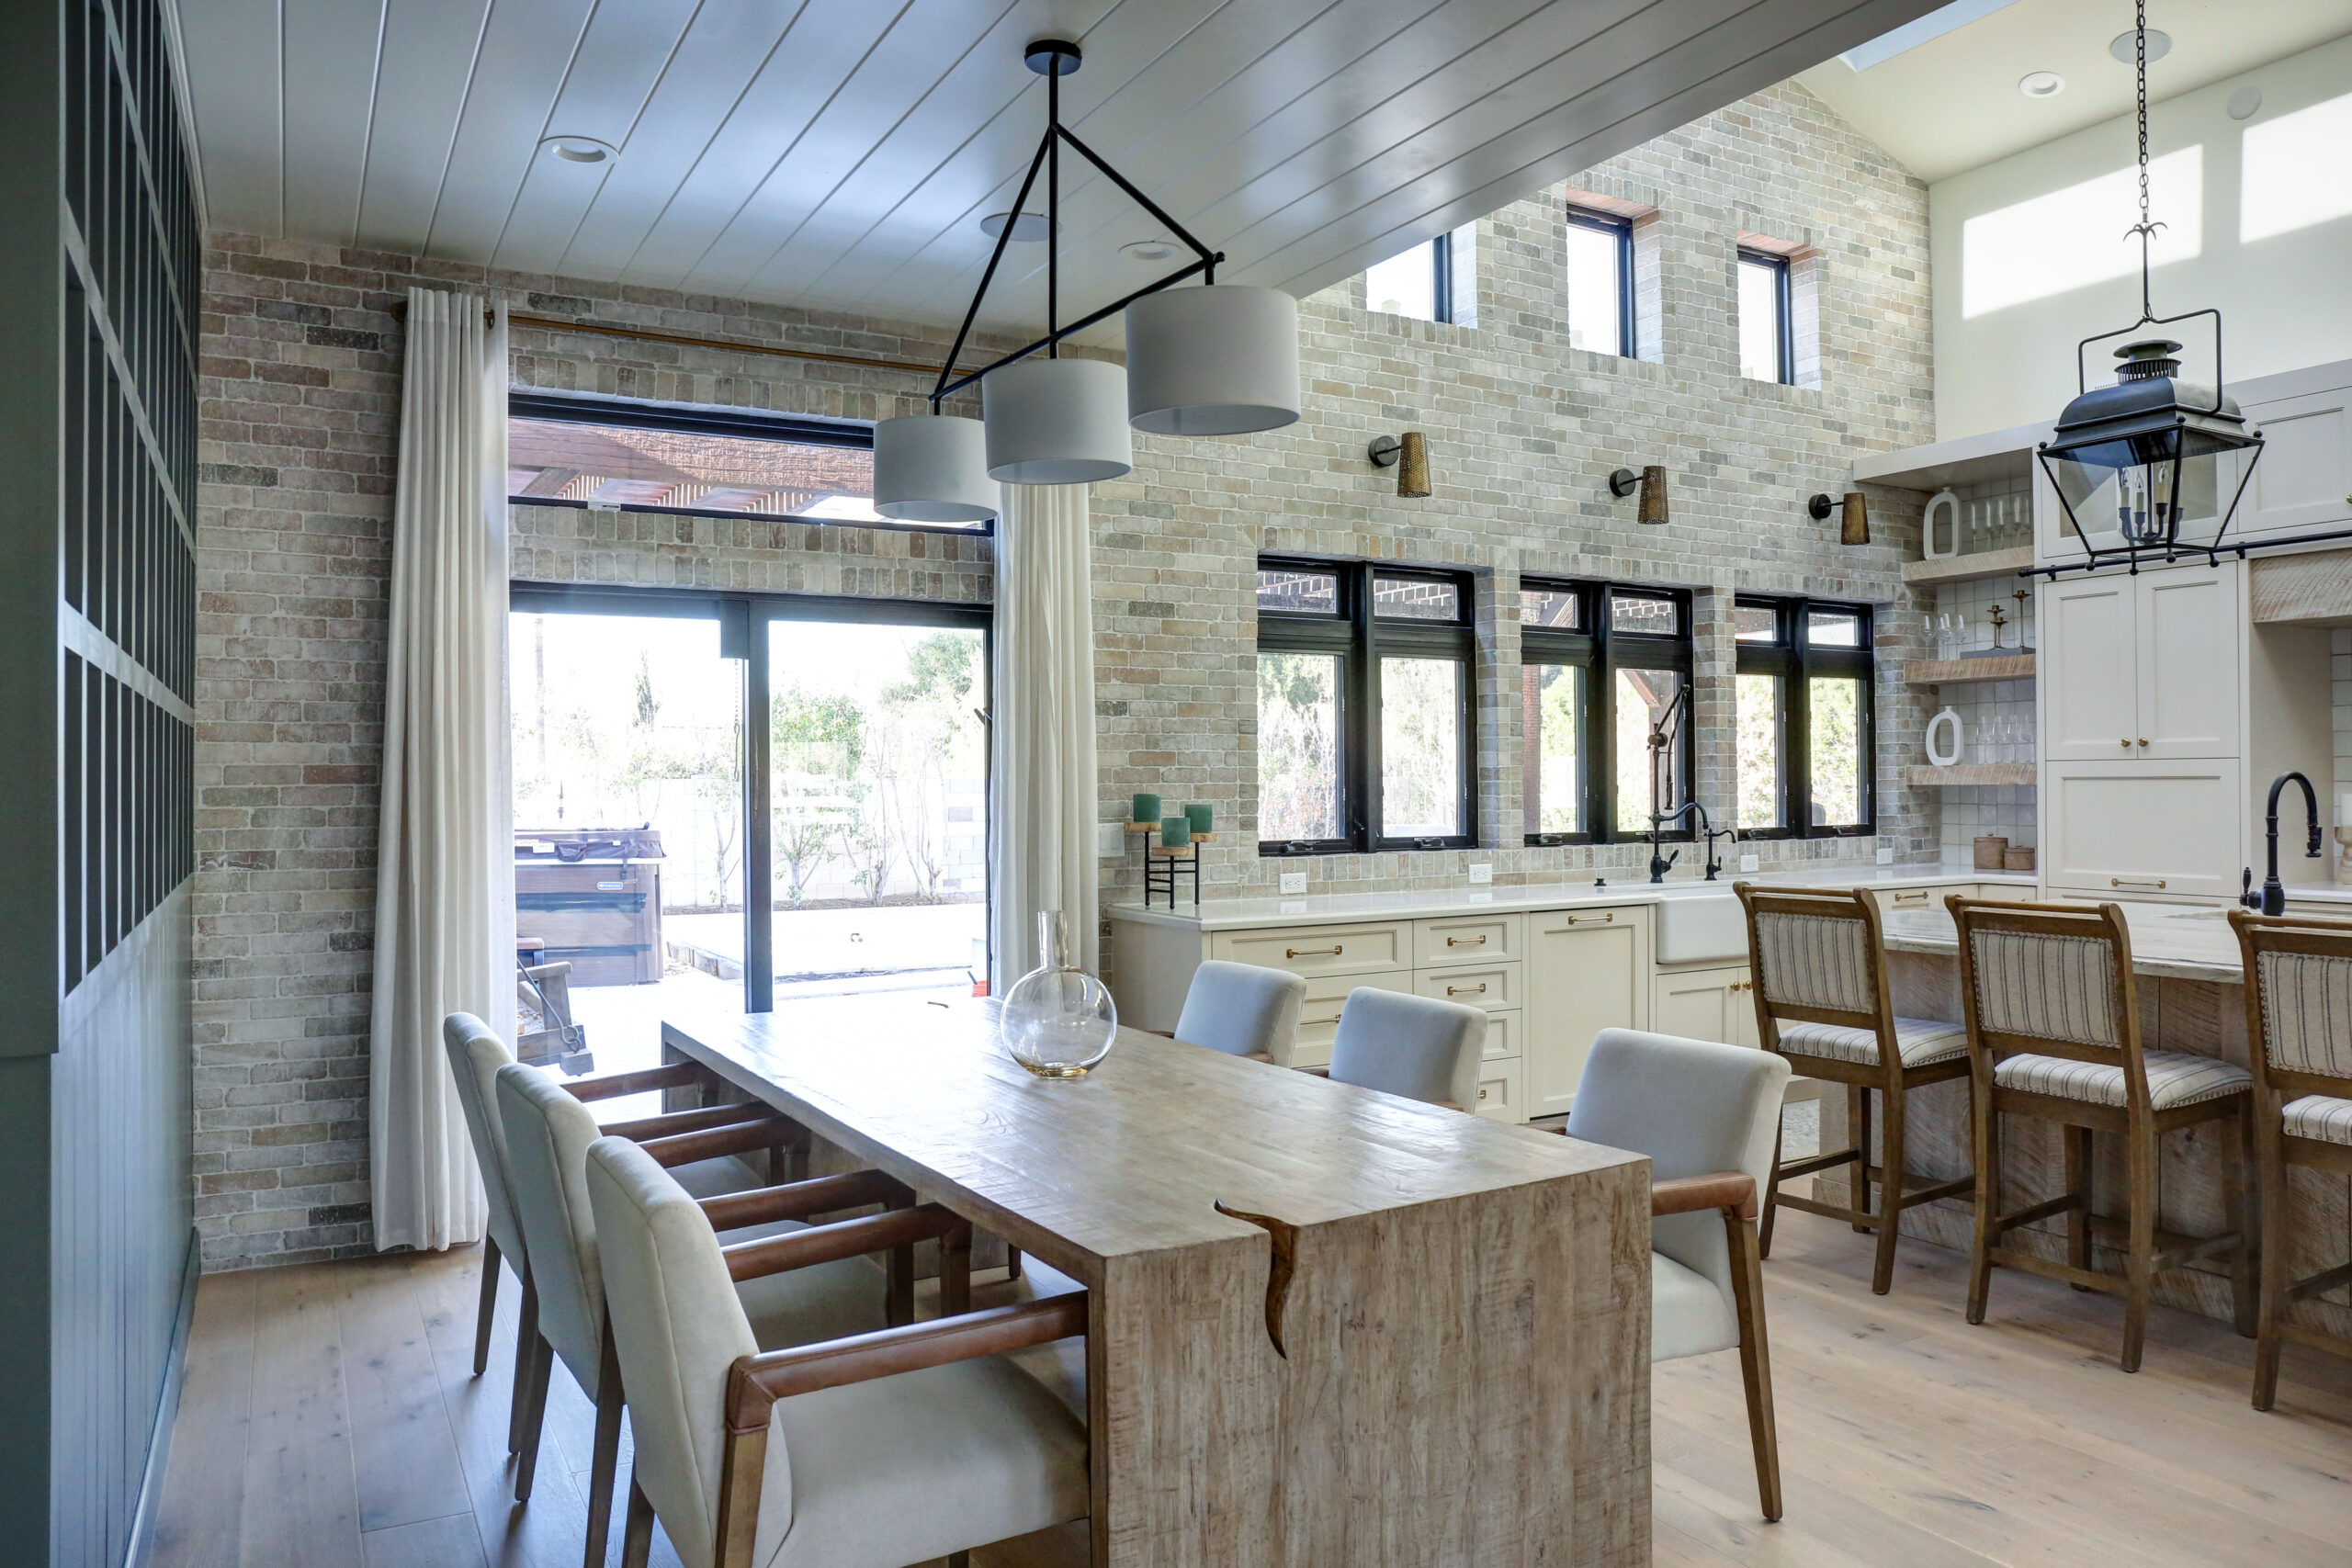
FLOORING: Tile or Wood? The answer will be different for each family. Talk to your designer about the pros and cons of each. This is purely up to you and what you want the space to be. I personally prefer wood to tile in the kitchen as it warms up the space, but a durability case can certainly be made for tile. In this specific home we went with an engineered hardwood.
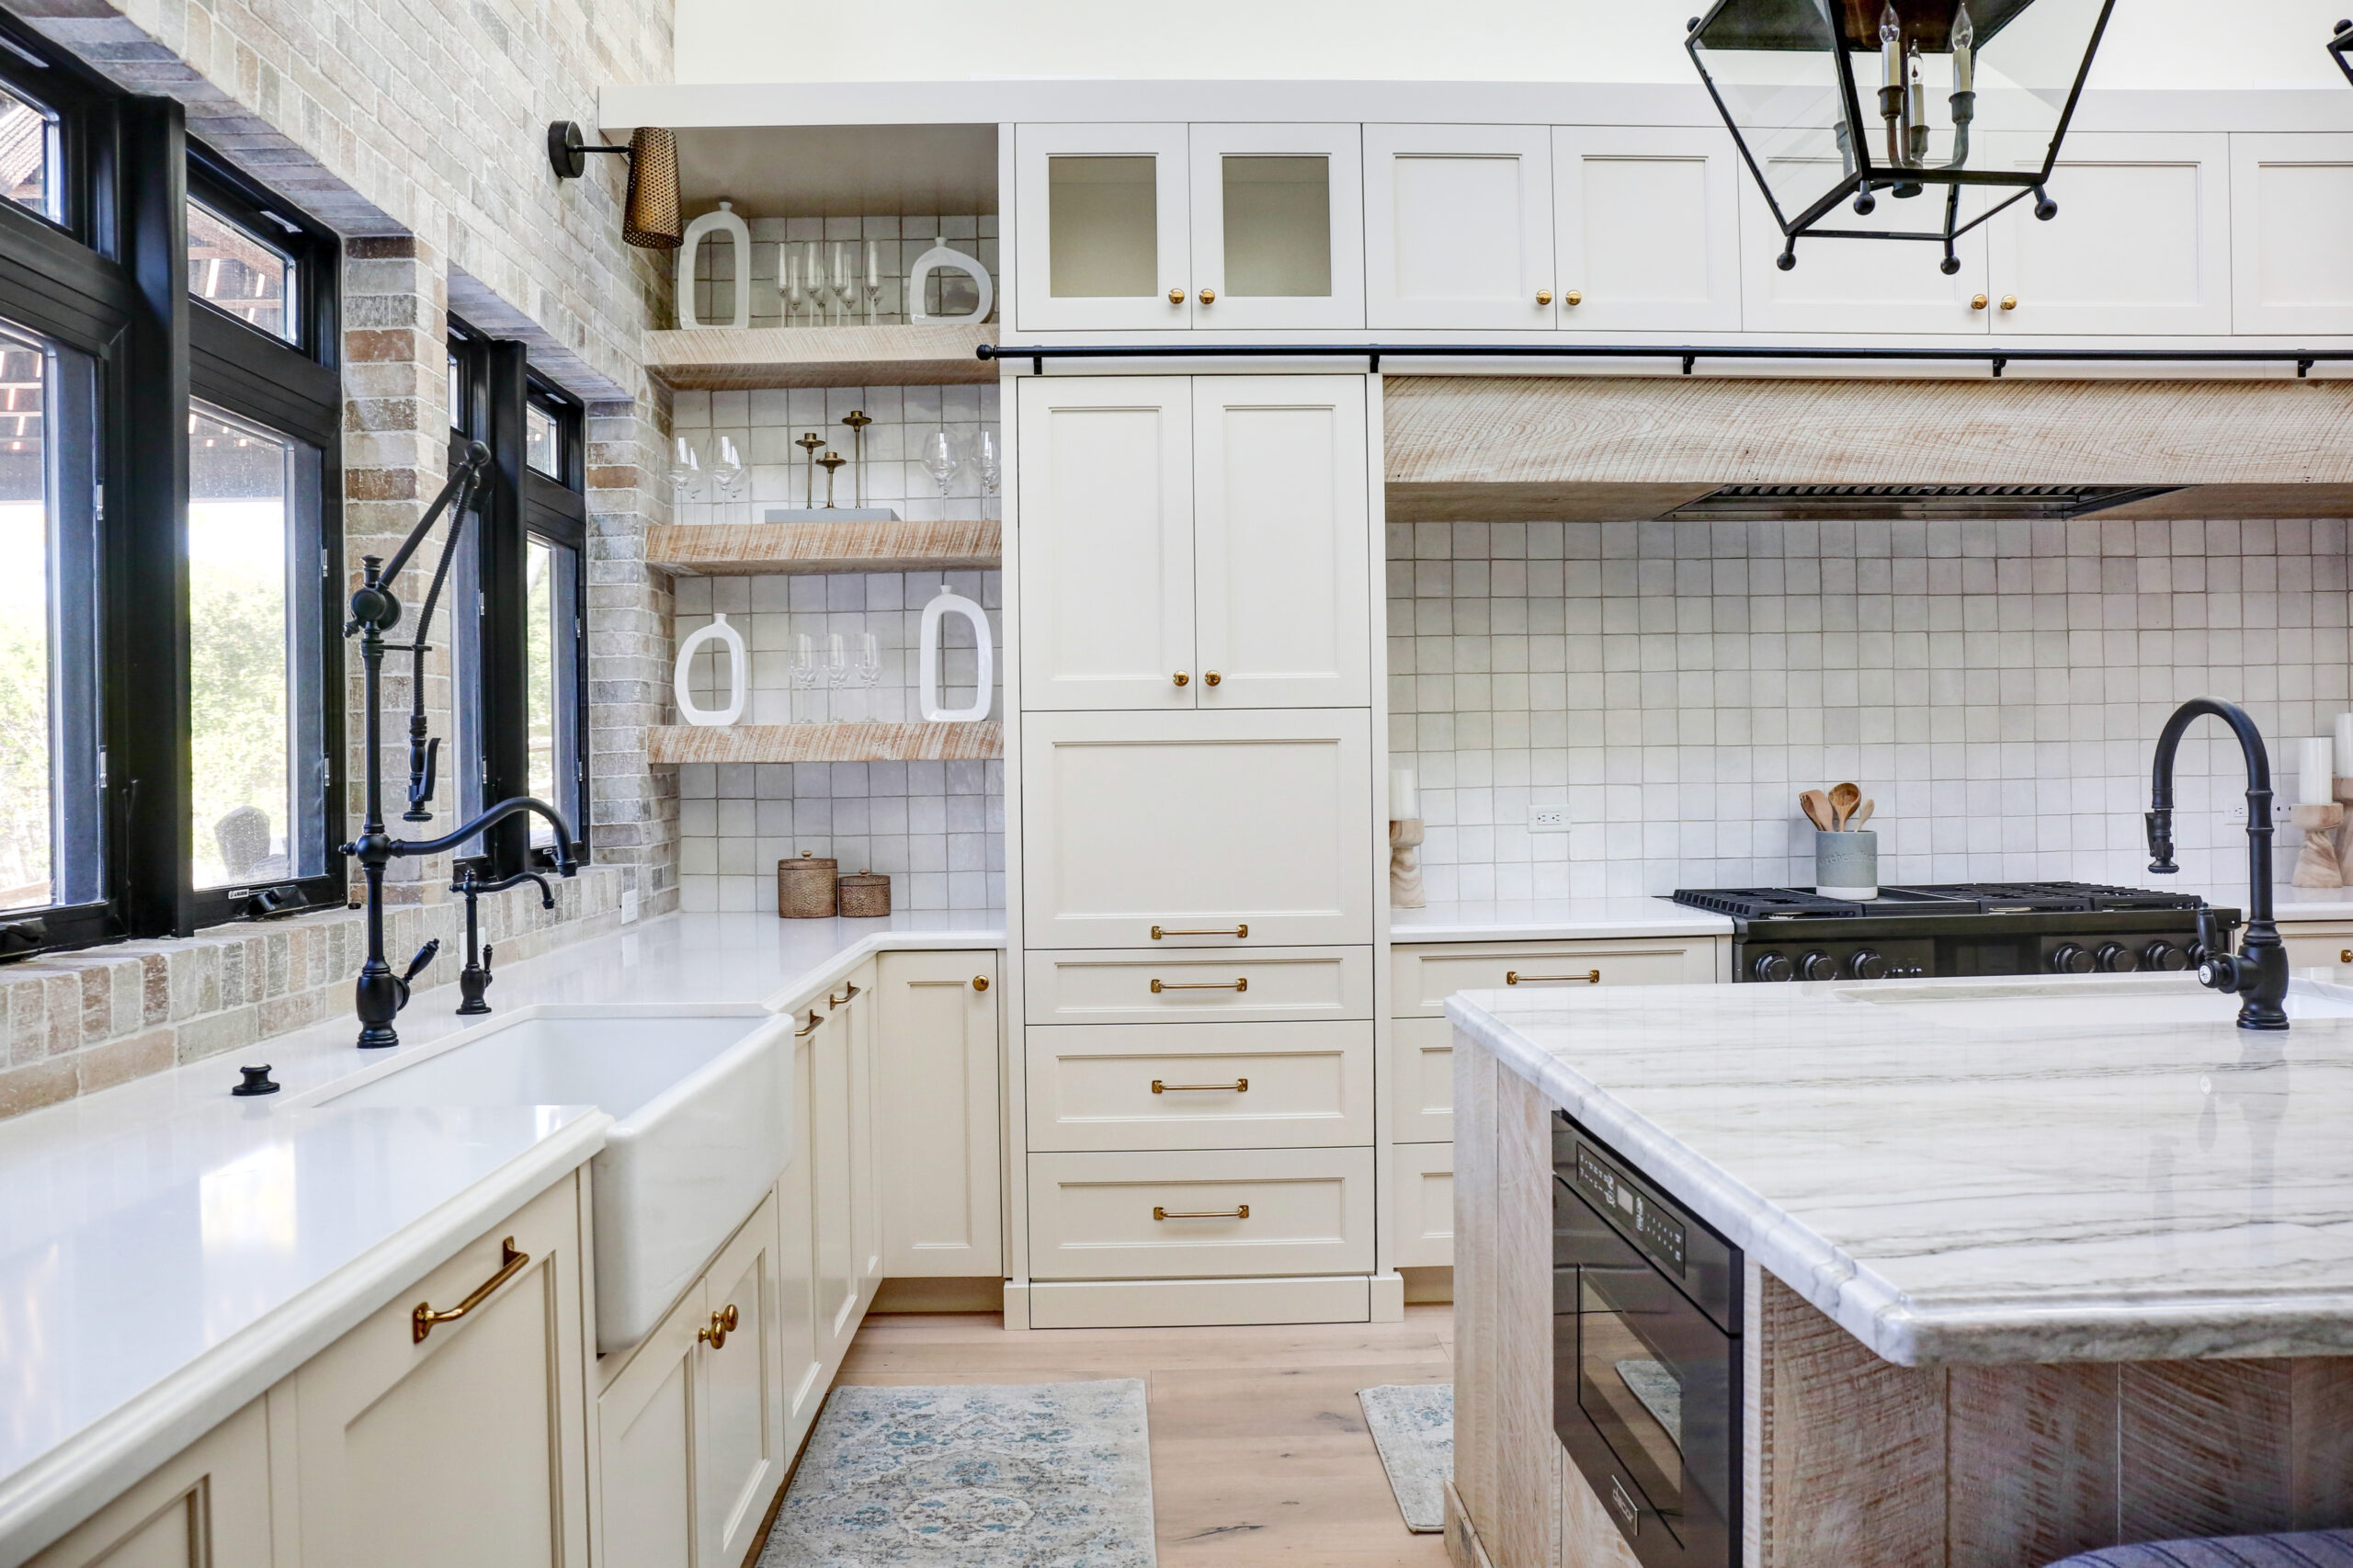
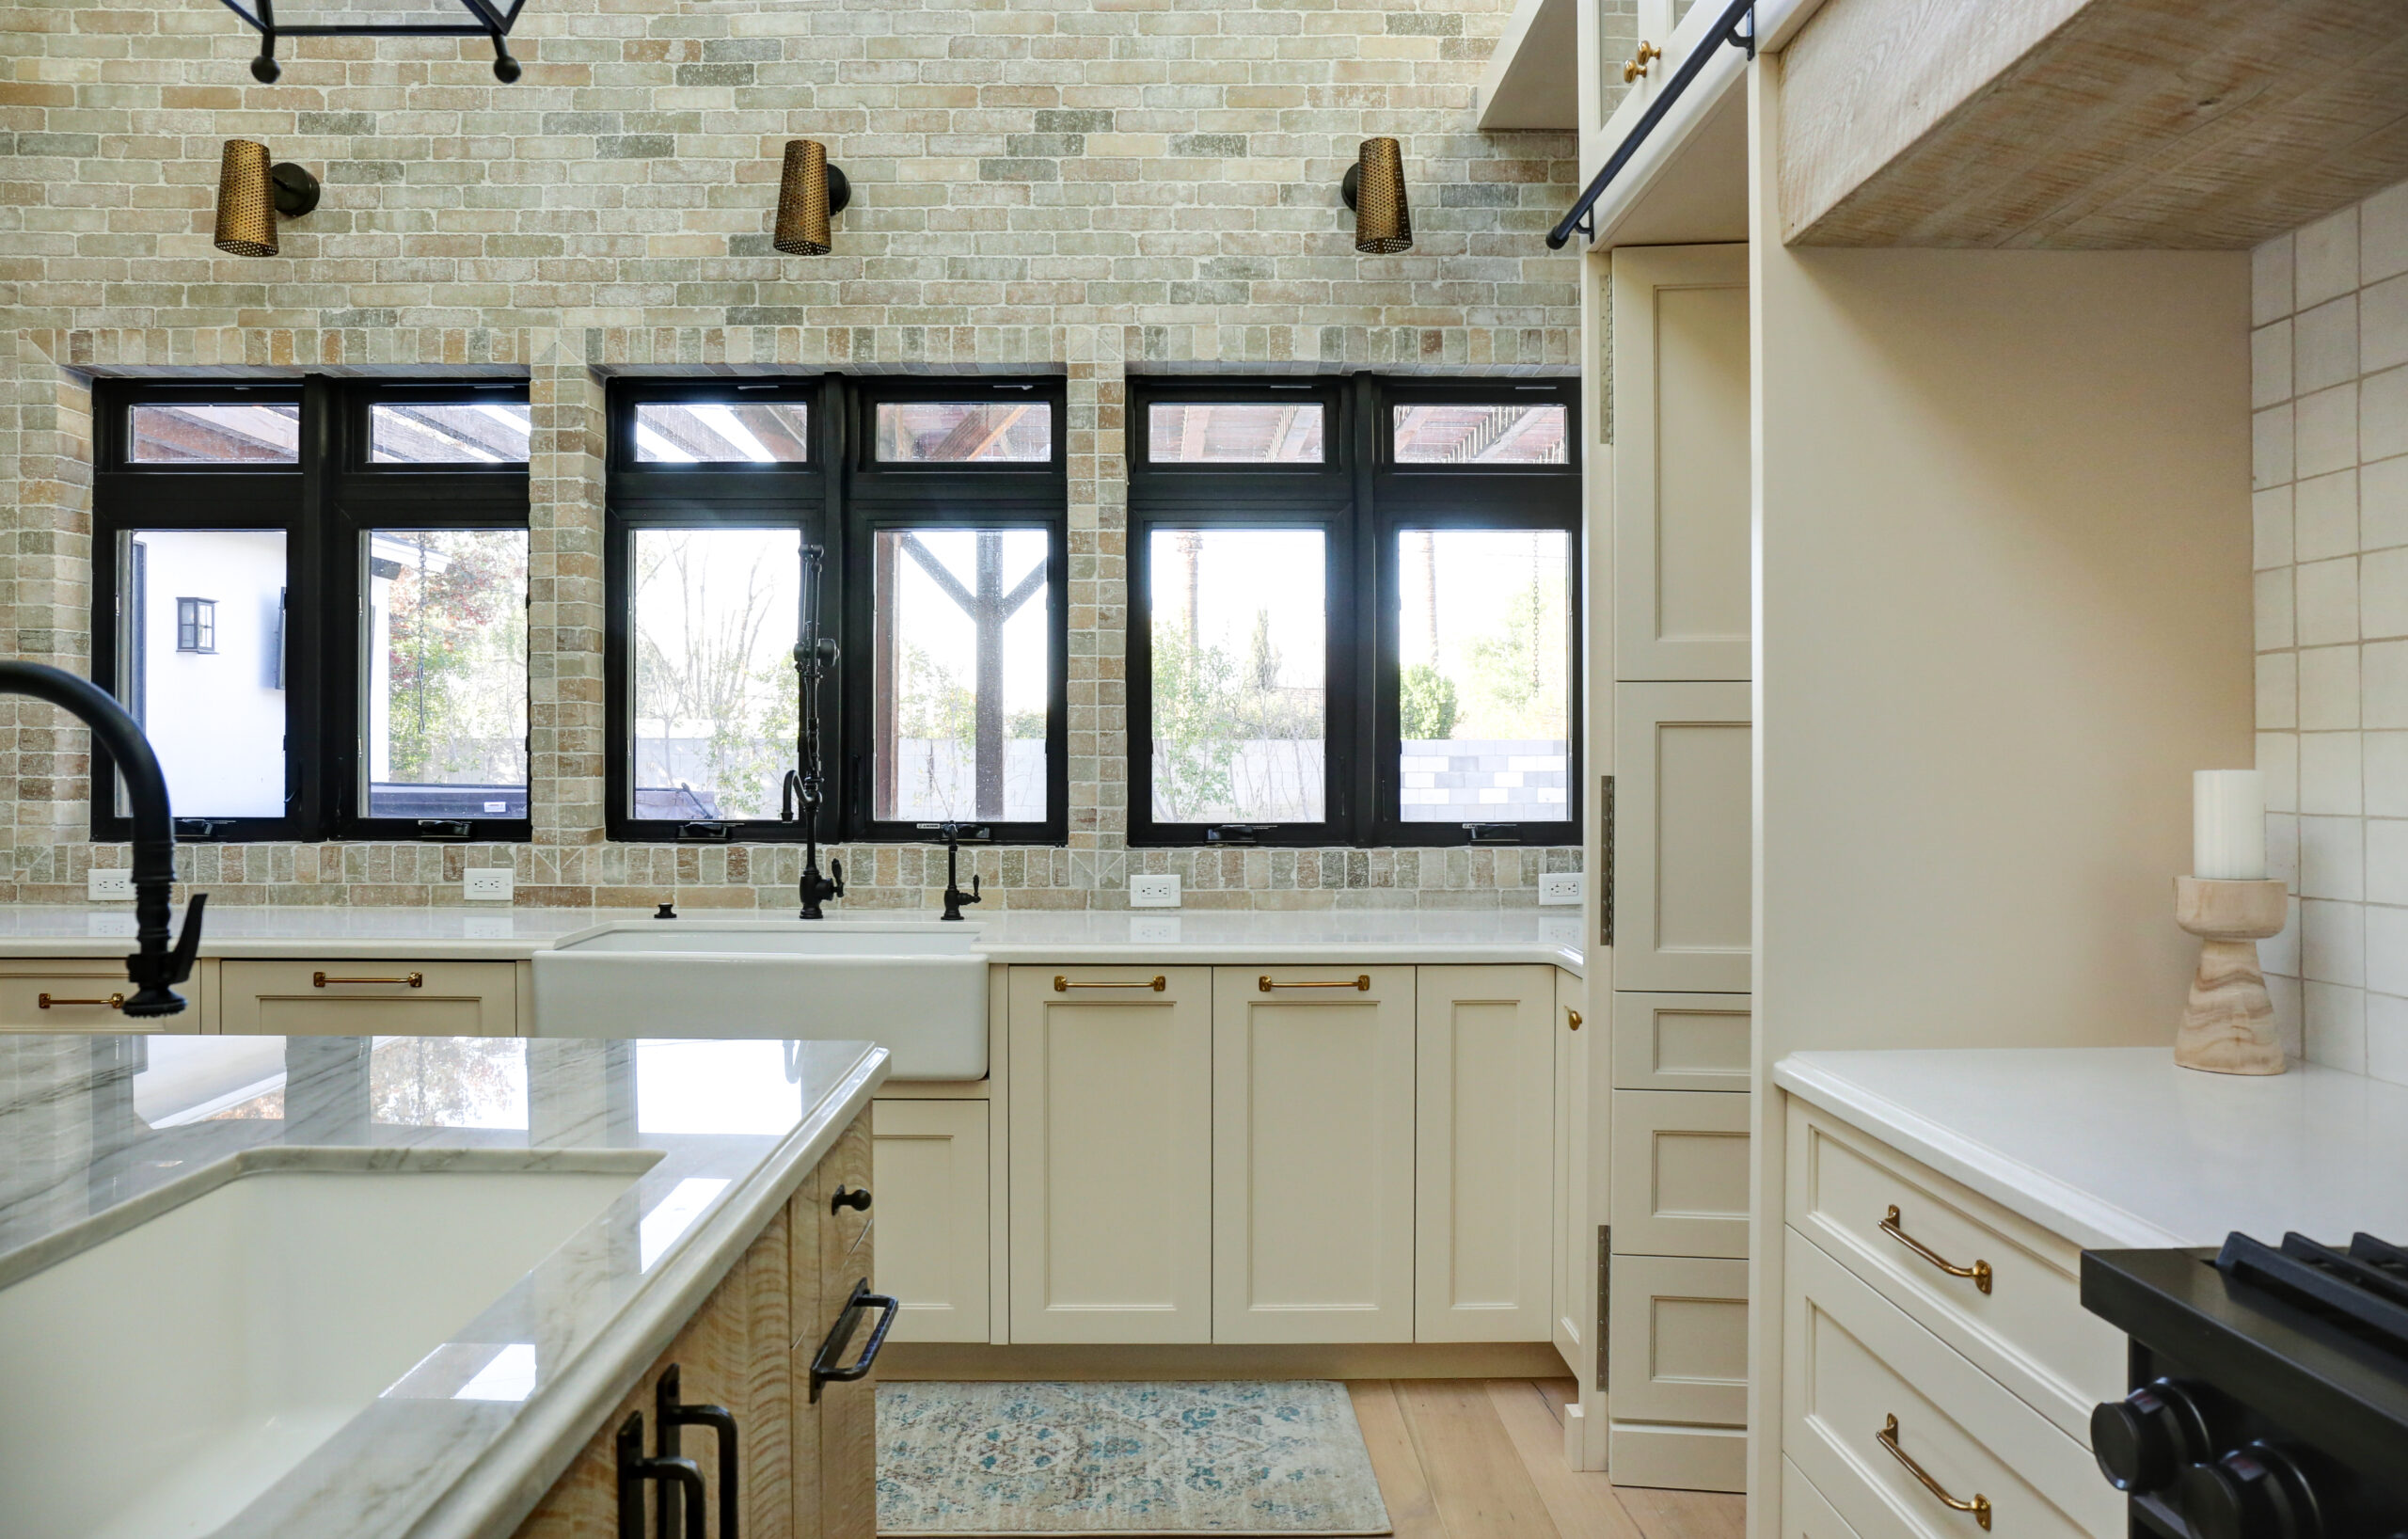
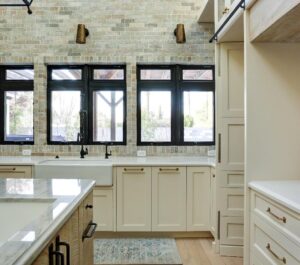
BACKSPLASH: For a Backsplash I want to say less is more. Meaning that for something to remain in style for a long time you want to make sure it is neutral and compliments the design. I chose this beautiful handmade zellige tile in Bright White as well as a thin brick from Summit Brick in the color Concorde.
COUNTERTOPS: Selecting Countertops for your family is important as well as making sure your lifestyle fits the product you select. What I mean by this is simple. Are you a messy cook or maybe clumsy with your wine? If so, Marble countertops are beautiful, but not for you. Are you an adult-only household and you keep it tidy? Limitless options for you if that is the case. My best piece of advice is to be honest with your designer about your lifestyle so we can help you select something that fits your family’s lifestyle. There are so many options to select from..Quartz, Quartzite, Granite, Limestone, Marble, Dolomite, Porcelain, Concrete, Precious Stones, and Travertine, to name a few.

Step 6: Schedule
Ask your contractor for a schedule and an itemized bid for all the work being completed. Please note that it is not a hard schedule or budget as things come up when doing remodels that are unexpected. Meaning that things can change, but a general schedule and bid of when to expect certain things to happen as well as general costs will help you navigate this process. This keeps everyone on the same page. Clear communication and set expectations. Please note that we already have a long lead time on items ordered at this point, so the schedule is able to happen because of this.
Step 7: Demo!
Now you can go to town and swing that hammer because we are ready to rock and roll.
Step 8: Framing
This is where the kitchen will begin to take shape. Literally. This is where you start to see progress. It’s not pretty for everyone, but this is my personal favorite time to really dream of what this will transform into. I can literally see it when I look at these 2x4s and I LOVE IT! Maybe it’s because I can’t wait for you all to see it and finally see the vision come to life.
This is where the kitchen will begin to take shape. Literally. This is where you start to see progress. It’s not pretty for everyone, but this is my personal favorite time to really dream of what this will transform into. I can literally see it when I look at these 2x4s and I LOVE IT! Maybe it’s because I can’t wait for you all to see it and finally see the vision come to life.
Step 9: Electrical & Plumbing
All of that planning is paying off because now we are installing all the electrical and plumbing to all the locations on the plans and drawings. Please note that this is not the pretty moment; this is simply the “guts or inside” to all of the selections.

Step 10: Drywall
Now we can cover up all of the “guts” and the shape of the room happens. This is when most people say this is taking so long and we are not seeing progress. I promise you, all of that stuff behind the wall is so important. It is what makes your kitchen work and function. This is when I promised my clients that big things are happening next!!
Step 11: Cabinets Installation
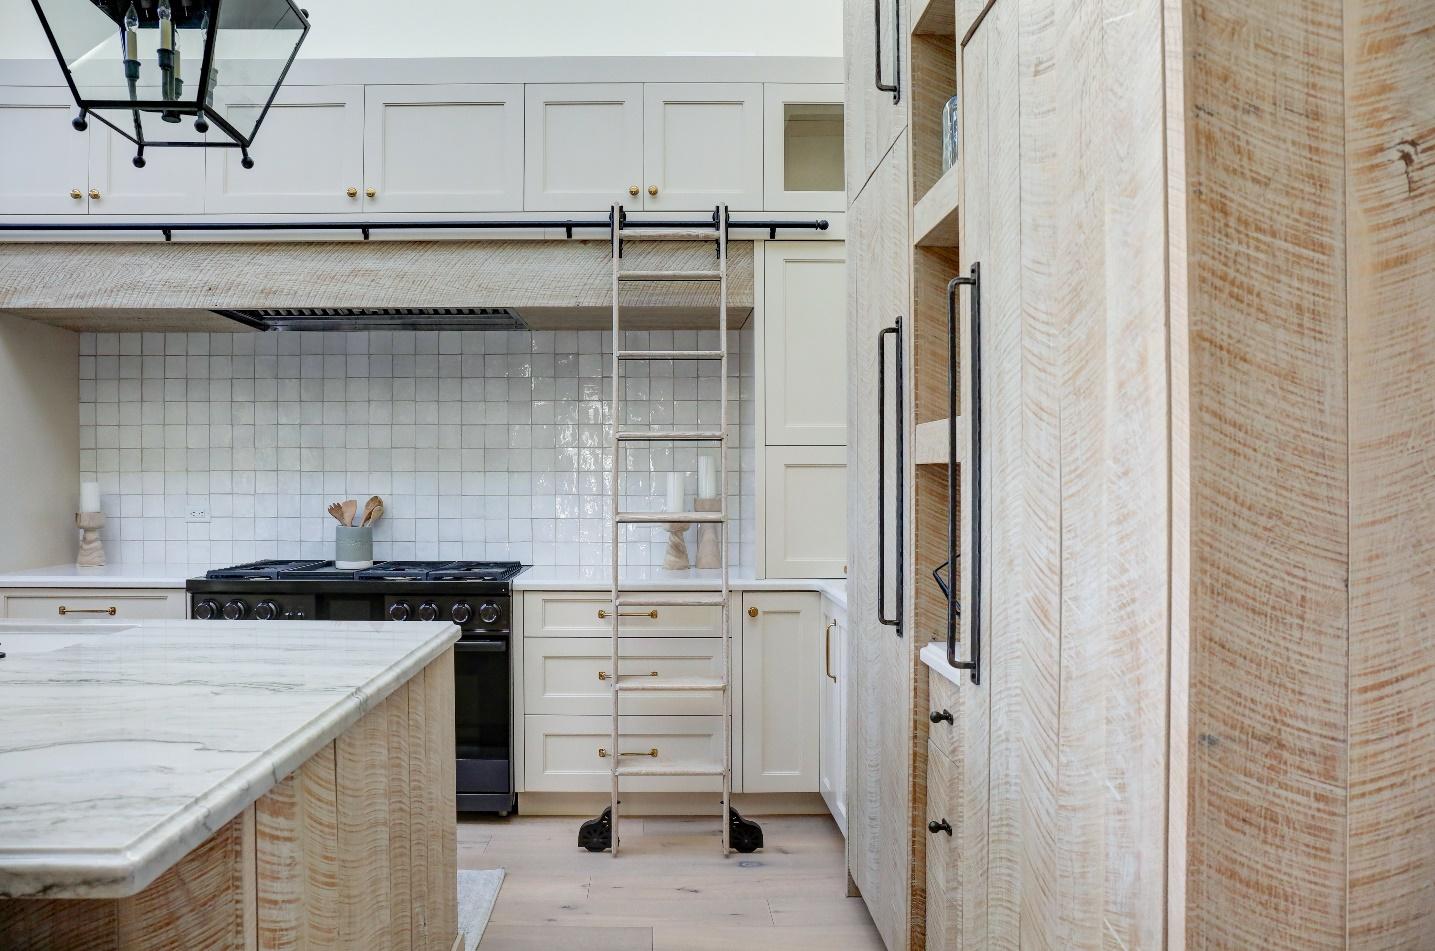
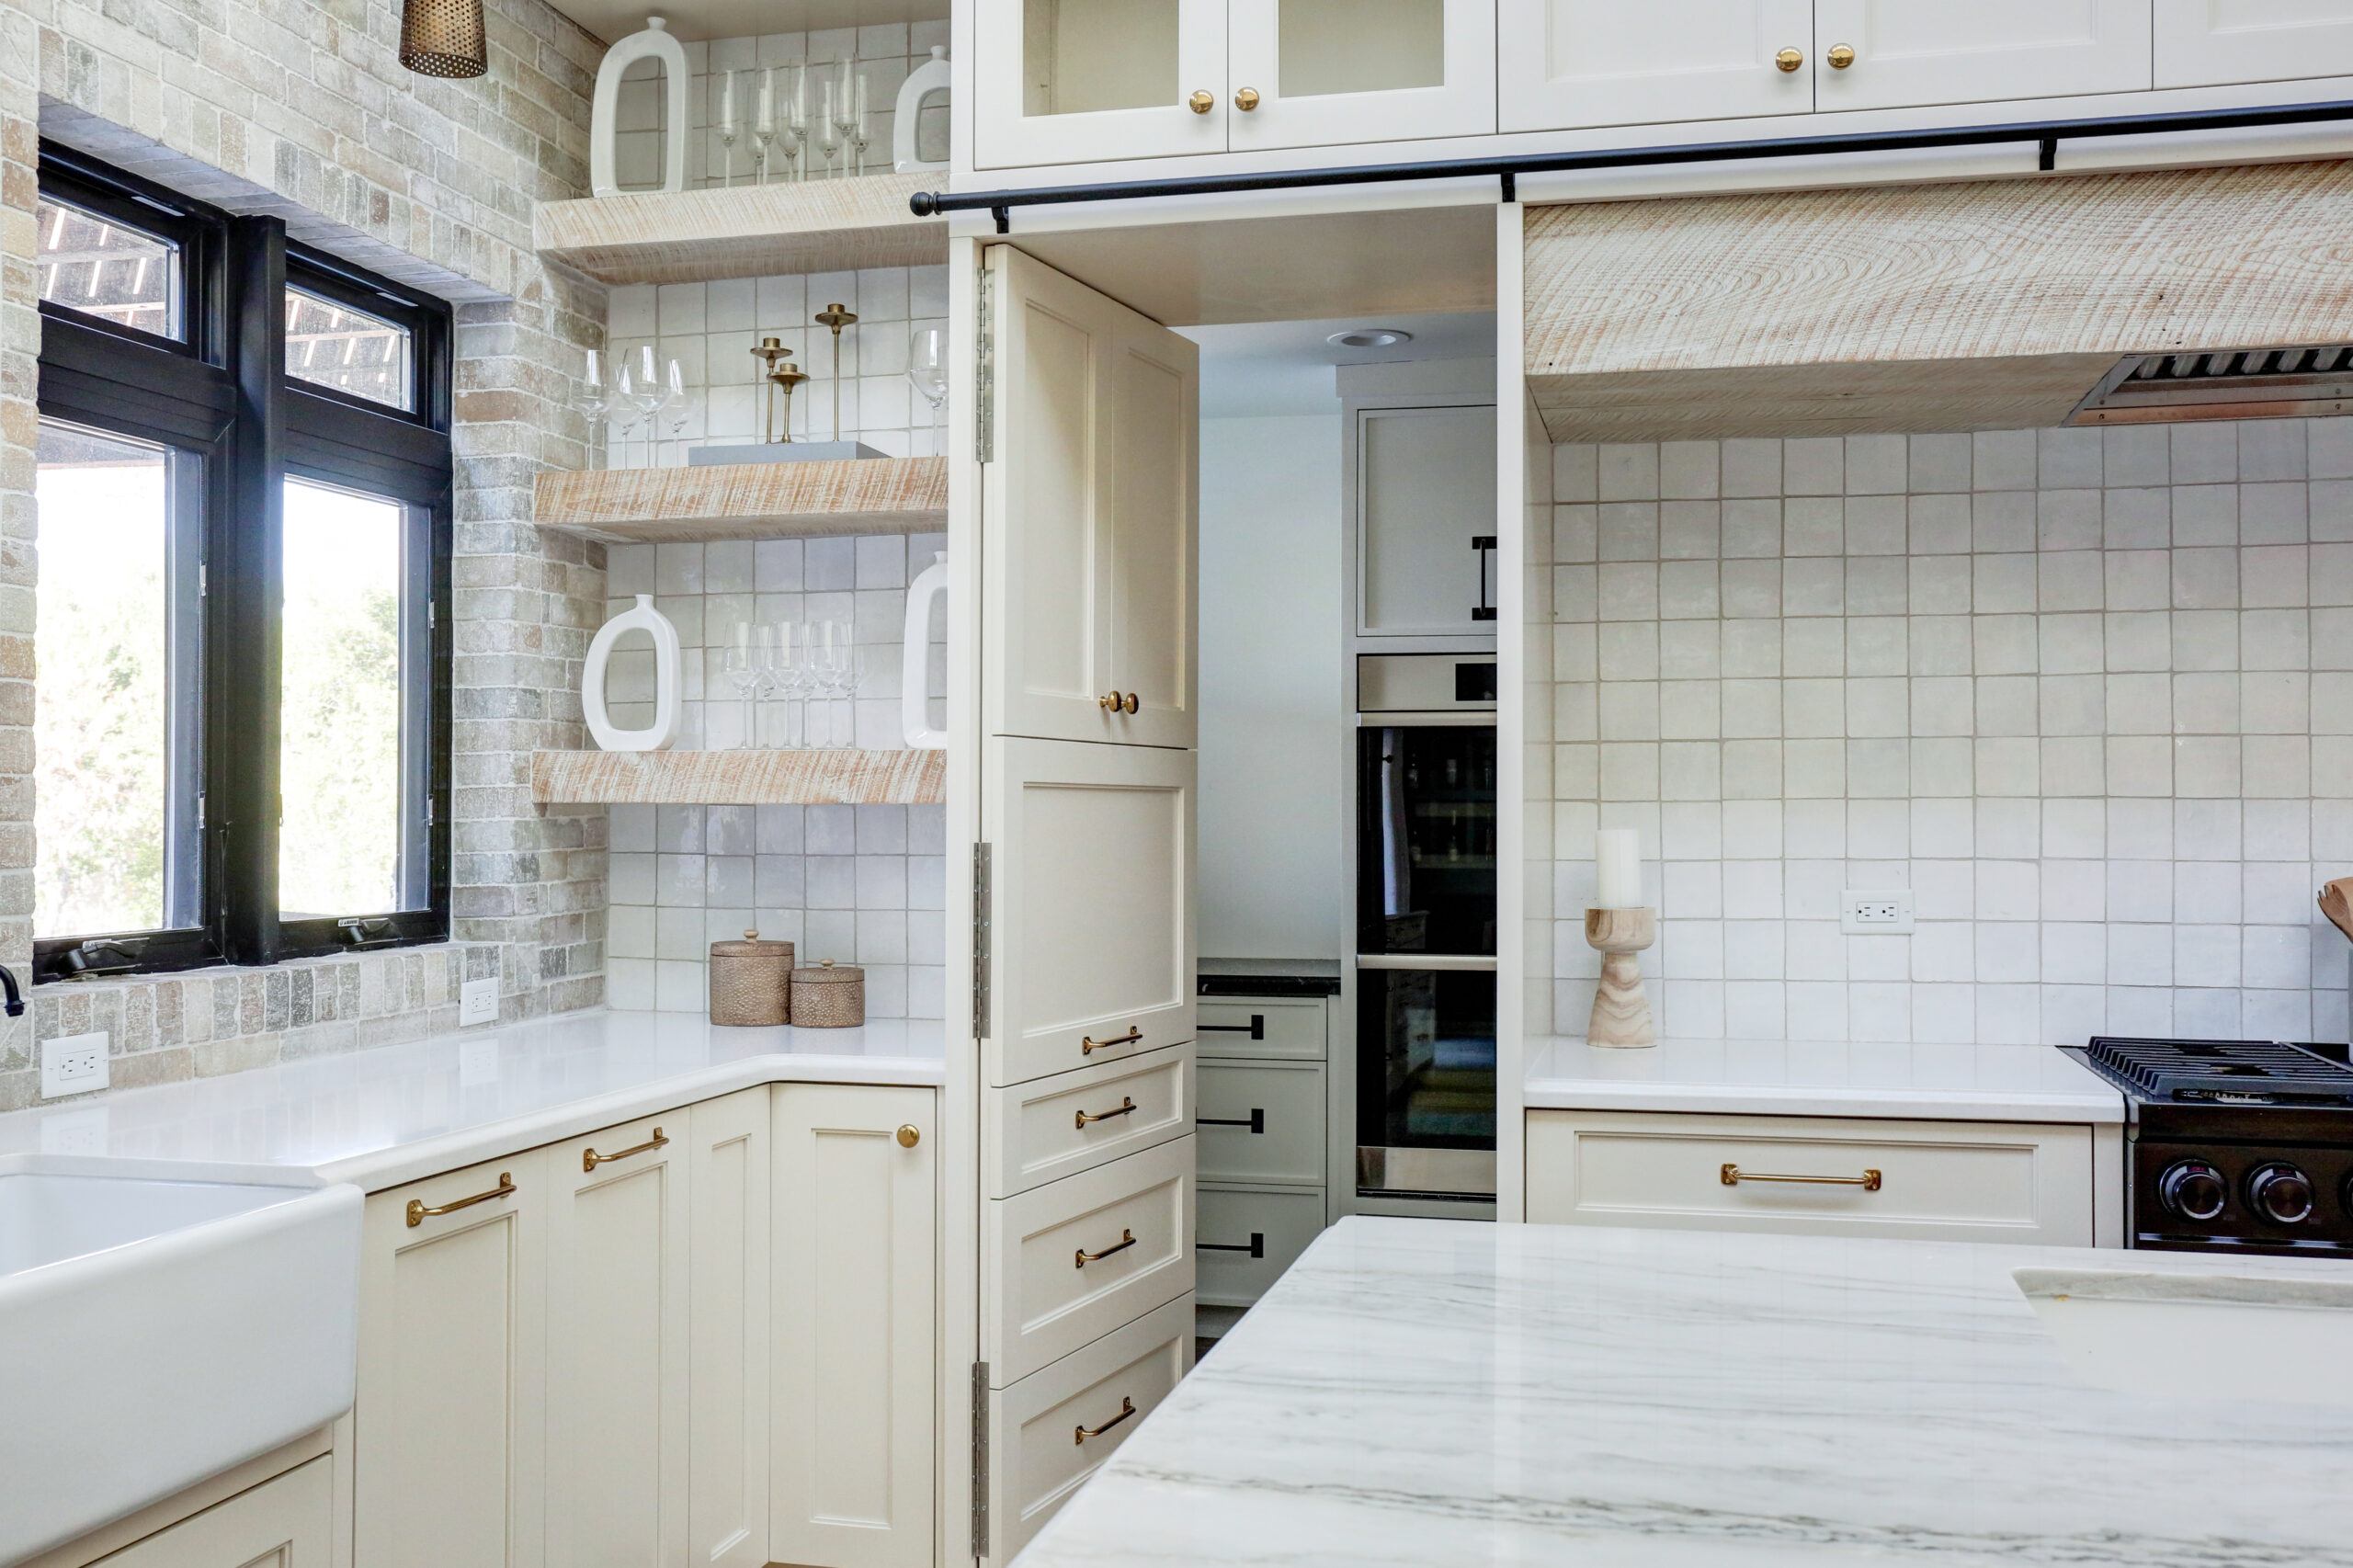
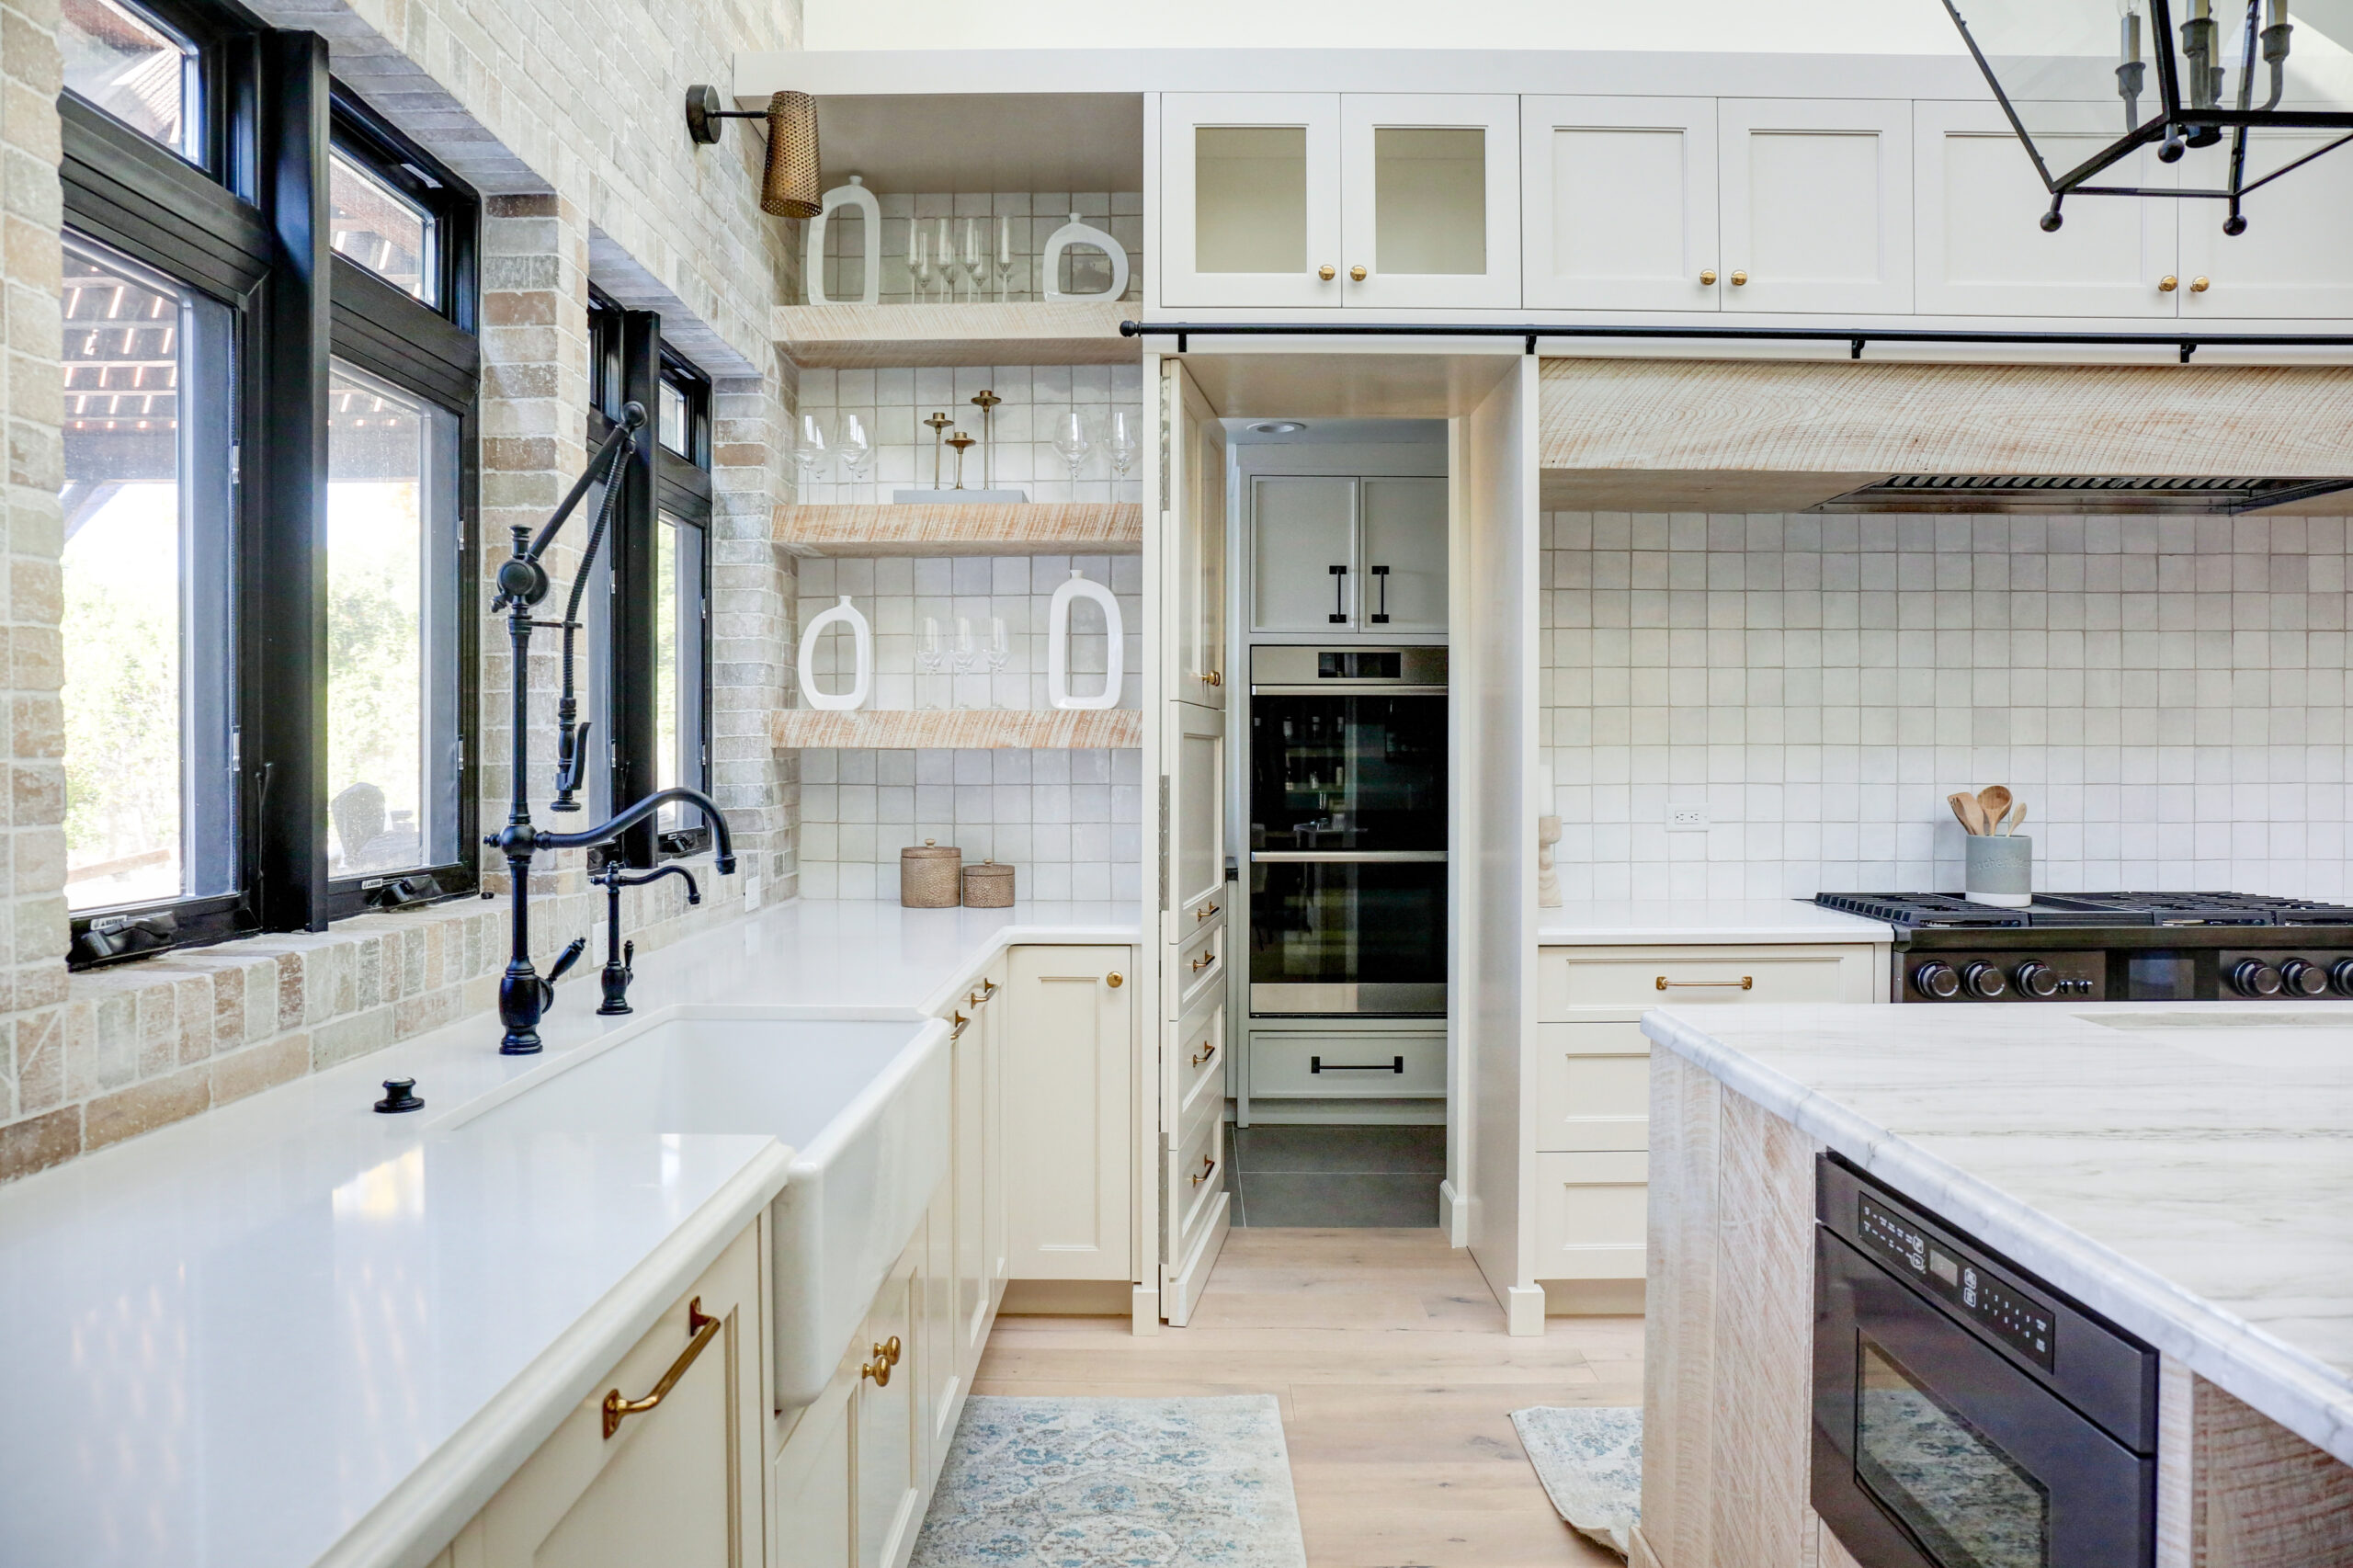
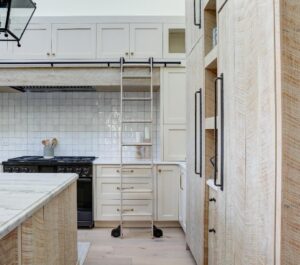
Yay! We designed cabinets a while ago so the cabinet boxes are being installed. This means the finished kitchen is almost there!! In this kitchen, to make it feel truly custom, we opted out of the standard white and did a custom color blend to warm up the space. Color is Sherwin Williams Accessible Beige at 25%. The kitchen island was a custom stain with a hint of the accessible beige to tie it all together. You will notice that the wood-stained cabinets have a rough finish on them. We really wanted a rough, not your run of the mill shiplap cabinets, so they used a 54” circular saw blade to cut/ding and beat up the shiplap cabinets.
Step 12: Countertop & Backsplash Installed (In this order)
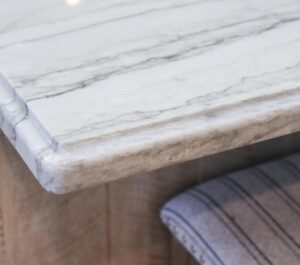
After Cabinet boxes are set it is time for the Countertop installer to come and measure for Fabricating the countertops. They will most likely come in and laser measure your space so that the countertops fit perfectly. General turnaround time for countertops is approximately 2-4 weeks from the measuring appt. I like to do some edge details on the countertops for a little special added touch. This is an upgrade as it is a grader fabrication process. Worth it in my opinion, if you like small details. The picture is of a Quartzite material with a flat ogee edge. This is approximately a 20-30% increase in fabrication cost.


Step 13: Appliances & Plumbing Fixtures Installation
Hang in there, we are at the final part of your kitchen remodel when everything comes together. If you are wng withorki a designer, most likely they have provided all the “spec” information to your cabinet company appliance installers and countertop fabricator. A spec sheet contains the detailed installation instructions and dimensions.
Step 14: Deep Cleaning
Everyone is over the remodel at this point in the project. I ask you to HOLD and have everything cleaned and countertops sealed before moving anything back in .A good cleaning is needed before completing your kitchen.
Step 15: Kitchen Completed
FINALLY!! This is when you get to step back and realize you made it!! It was all worth it 🙂 All my clients feel like that in the end. They are happy and exhausted at the same time. All the hard times are in the past and you are now in your beautiful kitchen smiling because it was even better than you thought it would be. A kitchen to me is where my family spends their time and as a mom of two boys I cannot stress it enough – build a kitchen with your family in mind so you all can use it and enjoy it for years to come.
I hope you enjoyed all of this information. Please feel free to reach out to us if you have a dream kitchen you want to start planning. I am always looking for new wonderful families to work with.
So much LOVE,
Dawn Miksta
Kozi Design – Owner & Principal Designer

